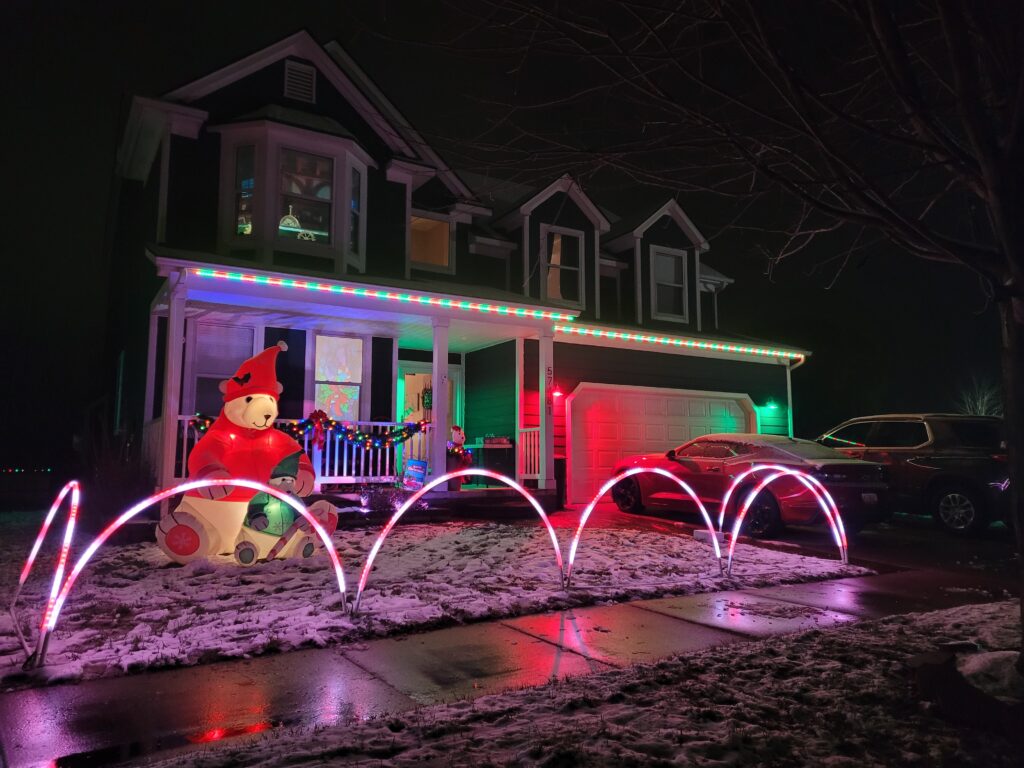
Welcome to my DIY tutorial to easily assemble dancing arches using PEX PVC and WS2812B LED strips! I am by no means an expert when it comes to holiday props, individually addressable LEDs, or electrical wiring. But, that said – I was able to DIY the following dancing arches and figured I’d share how I did it. The tutorial assumes some familiarity with WS2812B LED strips, WLED, etc.

Materials Needed:
For each arch, you are going to need the following materials:
- 1x – 10ft 1/2″ PVC pipe
- 1x – 10ft 1″ PEX white pipe
- 2x – 1/2″ PVC tee (with no inner threads)
- 1x – WS2812B 16.4ft 150 LED strip
- 2-wire and 3-wire cabling
- 3-pin waterproof LED connectors
- Alitove 5v 60A 300W power supply
- ESP8266 NodeMCU controller
- Weatherproof junction box
Tools Needed:
These are the tools I used, but your mileage may vary:
- Soldering iron, solder, etc.
- Solder sucker / desoldering wick
- Wire strippers
- Diagonal cutting pliers / nippers
- Shrink tubing
- Hot glue gun and hot glue sticks
- Electrical tape
- Drill with step drill bit or various sized drill bits to go from small to large
- PVC weatherproof cement
- Cut-off wheel or saw for cutting the PEX and PVC
DIY Dancing Arches Construction (PVC and PEX)
Let’s start with the easiest step of the process, the construction of the arches using PEX and PVC:
- Cut the 1″ PEX pipe to 9ft using a saw or cut-off wheel
- Cut the 1/2″ PVC pipe to 5ft 8in or whatever width you prefer. I needed my arches to be about 6ft wide, so I went with 5ft 8in to give me a little wiggle room. It worked out perfectly for my needs.
- With the left over 1/2″ PVC pipe, cut two 6″ sections so you have 1 section that is 5ft 8in (or your desired width) and two sections that are 6″ each. The rest of the PVC pipe can be discarded.
- Using the PVC cement, cement the 5ft 8in PVC pipe to the perpendicular pieces of the tee – this is your cross brace and helps hold the shape of the arch. You want the two ends that make a straight line to be vertical with the ground (See pictures below)
- Next, PVC cement each of the 6″ sections to the top of the PVC tee.
- Lastly, slide your 1″ PEX over the 6″ pipe to form your arch.
You will find that your cross-brace will want to bow downwards because of the tension from the arch. I’ve seen others “shape” their arch using tow straps to ratchet the arch down, this might help but I am not sure.

Power and Controller Box
Unfortunately I don’t have any pictures to share, but I used a Sunnyglade waterproof junction box (11.8″ x 9.8″ x 4.7″) as the housing for my power supply and WLED controller.
My power supply is an Alitove 5v 60A 300W power supply. This power supply is very easy to work with.
Last but not least is an ESP8266 NodeMCU flashed with WLED.
You’ll want to wire everything together and your main output to your first arch can be with a waterproof connector so you can disconnect the box from the arch. I didn’t have enough waterproof connectors to do this, though, so my box is hardwired to my first arch.
I’ll eventually build this section out with more information – sorry!
Soldering / Prep-work before assembly
I’ve always appreciated being able to work on the WS2812B LED strips ahead of the final assembly. In theory all you have to do is some easy solder work to finish the job.
Separating the LED strip in half
Each WS2812B strip can be used to make 2 arches. What you will want to do is find the middle point of your 150 led (16.4ft) strip. You will find that exactly at the halfway point of your strip is a solder joint. Use your diagonal cutting pliers (“nippers”) to cut cut into the silicone on either side of the solder joint, then peel the silicone off of the strip. While you have your nippers, also use them to cut the adhesive backing for when you separate the LED strip. Now that your solder joint is exposed, you’ll want to use a solder sucker or desoldering wick to remove the solder from the connection.
Once you remove enough solder, the joint will come apart and you’ll be left with 2 equal LED strips (75 LEDs per strip). Here’s an awesome video from Bostick Family Light Show which shows how to separate the LED strip into two equal strips.
Wiring the freshly separated LED strips
Next we will want to re-tin the pads so they have some solder on them. After that you’ll want to take your 3-wire cable and solder them on to the pads accordingly. I’m assuming that if you’re tackling this project you have some experience with this. I *really* recommend watching The Hook Up’s video and following his steps to solder the wires, hot glue, shrink tube, etc. Give yourself at least 8″ of wire at the end of the strip. In the end you’ll cut most of it off and it may be for waste, but I’d rather be safe than sorry and have enough wire than start to assemble and be too short. You will also want to add power-injection wires so you have at least 8″ of power-injection and the 3-wire for the LED strip.
Once the freshly separated side is finished, you will want to cut the factory plug off of the other side of the strip and again add extension wires to both the power injection and the 3-pin so that you have at least 6″ of extra wiring.

Extend the waterproof connectors
Next you will want to add extensions to your 3-pin waterproof connectors. I added way more wire than I needed – again, I’d rather be safe than sorry.
And that’s it for the “pre-electrical” work! Now let’s start assembling this arch!
DIY Dancing Arches – Final Prep for Assembly
Next is the most time consuming part of the assembly. I averaged about 2-3 hours per arch and most of it was with these steps. Take your time but remember there IS a light at the end of the arch 😉
First I removed the 1″ PEX from the PVC assembly and set it aside.
Next I used various size drill bits starting with really small and moving up to a final hole size of 3/8″ – drill your hole straight across from the 1/2″ PVC brace. This will be used for the waterproof connectors so you can connect/disconnect your arches from eachother or the control box. I used a razor to clean off the plastic shavings from the hole so it will be nice and clean.

Thanks to an awesome video on how to daisy chain your holiday props like a champ, I decided I wanted to run power-injection through the cross-brace so that all of my props had power injection at the start and end of the strip and would help carry the power from the 1st arch to the last. I saw a handful of different 3D printed foot pads and/or arches which used metal tubing cross-braces but none of them accommodated for the wiring to make a rotated “D” shape so I guess this makes my arches somewhat unique.
Insert your power injection wires
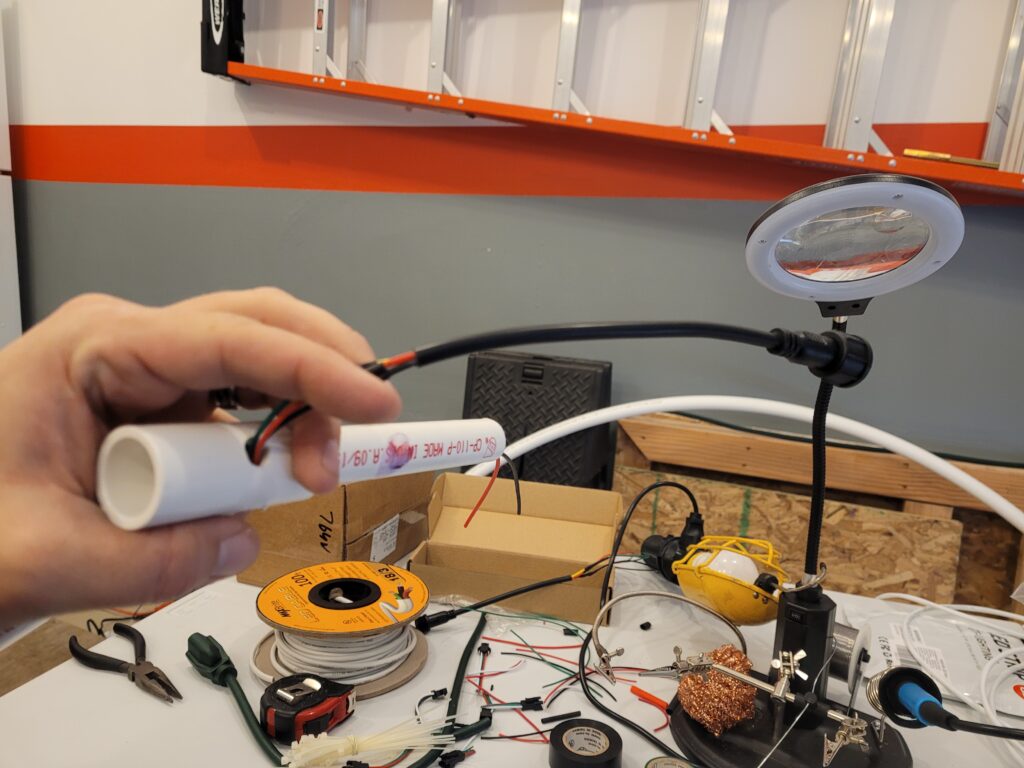
This part is a little tricky but you’ll want to take your power injection cable and insert it through the top of the tee on one side and feed it down, then use your finger to push the cable into the cross-brace 1/2″ PVC tube, then keep feeding it through. When it gets to the other side, you’ll want to shove your finger into that tee and push the wire up so it’s aimed to come out of the 6″ extension piece, and again keep feeding it through. Keep feeding until you have a few inches of power injection wire coming out the top of both tees.

Insert waterproof connector wiring
Next you’ll want to feed your extended waterproof 3-pin connector through the hole you drilled, use your finger to feed the wire up towards the top of the tee. What I ended up doing is feeding the entire waterproof connector harness all the way up until just the connector was at the base of the hole. When I later had everything soldered, I pulled the connector back out of the hole and that helped get rid of slack in the 3-pin wiring to the LED strip.


DIY Dancing Arches Assembly – Input side
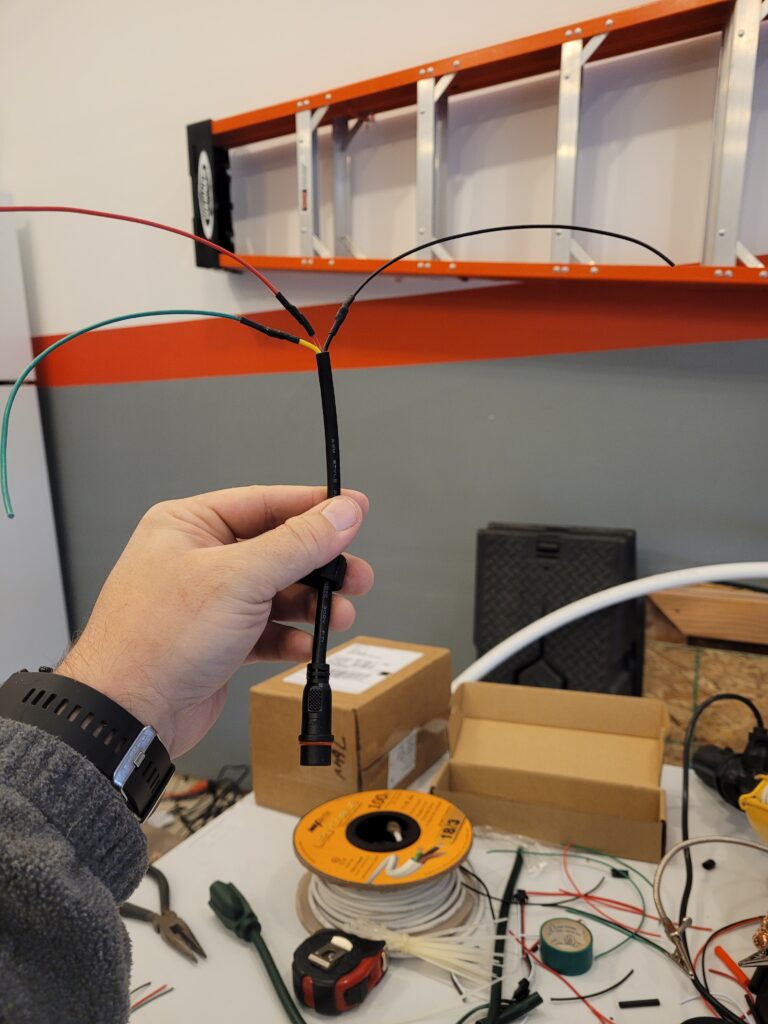
Solder your connections!
Now that all your wiring is present at the top of the tee, the first step is pretty straight forward. Cut your wires to whatever length you feel comfortable with (be mindful that you need to tuck extra wiring into the PVC pipe), then strip and solder the 3-wires from the waterproof connector to the WS2812B LED strip and then solder the 2-wire power injection cable to the power injection wires on the WS2812B LED strip.
**BE MINDFUL OF THE DIRECTION OF THE INDIVIDUALLY ADDRESSABLE LEDS!** I did my best to try to be uniform with my arch construction, but I didn’t pay close enough attention on my 4th arch and it messed up the remaining arches. Just to be OCD, I used the waterproof connector with the screw nut (“male side”) as the “input” side of the arch, making sure the WS2812B strip’s arrows were aimed so they were going down stream. At the end of my arch, I tried to make it a point to use the “female side” of the connector.
Remove wiring slack
When you have your input side fully soldered to the WS2812B strip, pull the waterproof connector out of the hole to remove as much slack as possible. But be mindful so that you don’t pull too much out of the hole and you have exposed (shrink tubed) wires which aren’t meant to be waterproof. I made it a point to try and leave enough of the waterproof connector up in the tee. Once I pulled the connector out, I took my hot glue gun and hot glued all around the waterproof connector harness so the harness would be held in place.

Inserting the LED strip into the PEX
The Bostick Family Light Show video for separating the LED strips also talked about using the U-channel diffusers as a “sled” for the LED strips. This proved to be very useful! I zip-tied my light strips to the diffuser and had just enough room to slide everything into the PEX. It’s still awkward to work with the multiple pieces of diffuser, but once it’s in the tube you’re good.


Next you will want to slide your LED strip into the 1″ PEX pipe and finally slide the PEX pipe over the one side of the 6″ PVC extension. This should complete the one side of the arch! (cue celebratory music)
DIY Dancing Arches Assembly – Output side
You are going to want to re-do everything you did on the input side! Shove the waterproof connector in through the hole until the wiring is all the way in to the plug, then it’s time to solder all the wires together just like you did on the input side.
It’s really hard to work on the other side of the arch now that there’s tension and the PEX tube wants to be straight instead of an arch! Unless you have someone willing to hold everything for you, you need to improvise! What I found works best is using a hanger wire taped to the 6 inch 1/2″ PVC piece and the 1″ PEX as a bridge to keep the two pieces together while you do the final soldering joints.

Once all the wires are soldered together, just like you did on the input side you’ll want to pull the waterproof connector out of the hole and then hot glue all around the hole and connector to keep it held in place. Lastly, I tucked the extra wire into the 6″ PVC as best as I could, then pushed the PEX down onto the PVC. It’s a tight fit with all the wiring, but it should work.
You have successfully built your first arch! Now rinse and repeat for all the other arches you want to build! Thank you for reading my DIY dancing arches tutorial!